A mixed media piece

A mixed media piece

Friday 22 December 2017

Trio of Tags using Boozy Bear and Deco Art

Hi everyone I hope you are well I have my piece using the lovely shapes that we 
were given from Boozy Bear I hope you enjoy reading how I did it as much 
as I did making the tags.
 
 This is a photo of the shapes that were sent to me and the other members of the DT 
we were all asked to make a piece and look at all the different results.
I also used a couple of other Boozy bear pieces that I had in my stash,
they were the picture frame and i cut up a couple of the pieces 
to fit in with what i was trying to achieve.
 So above I cut the hands off with the flourishes as you will see further on.
I started with the wings i put black modelling paste through a stencil 
then used a texture comb and ran it up and down the
 wings so it gave them ridges.
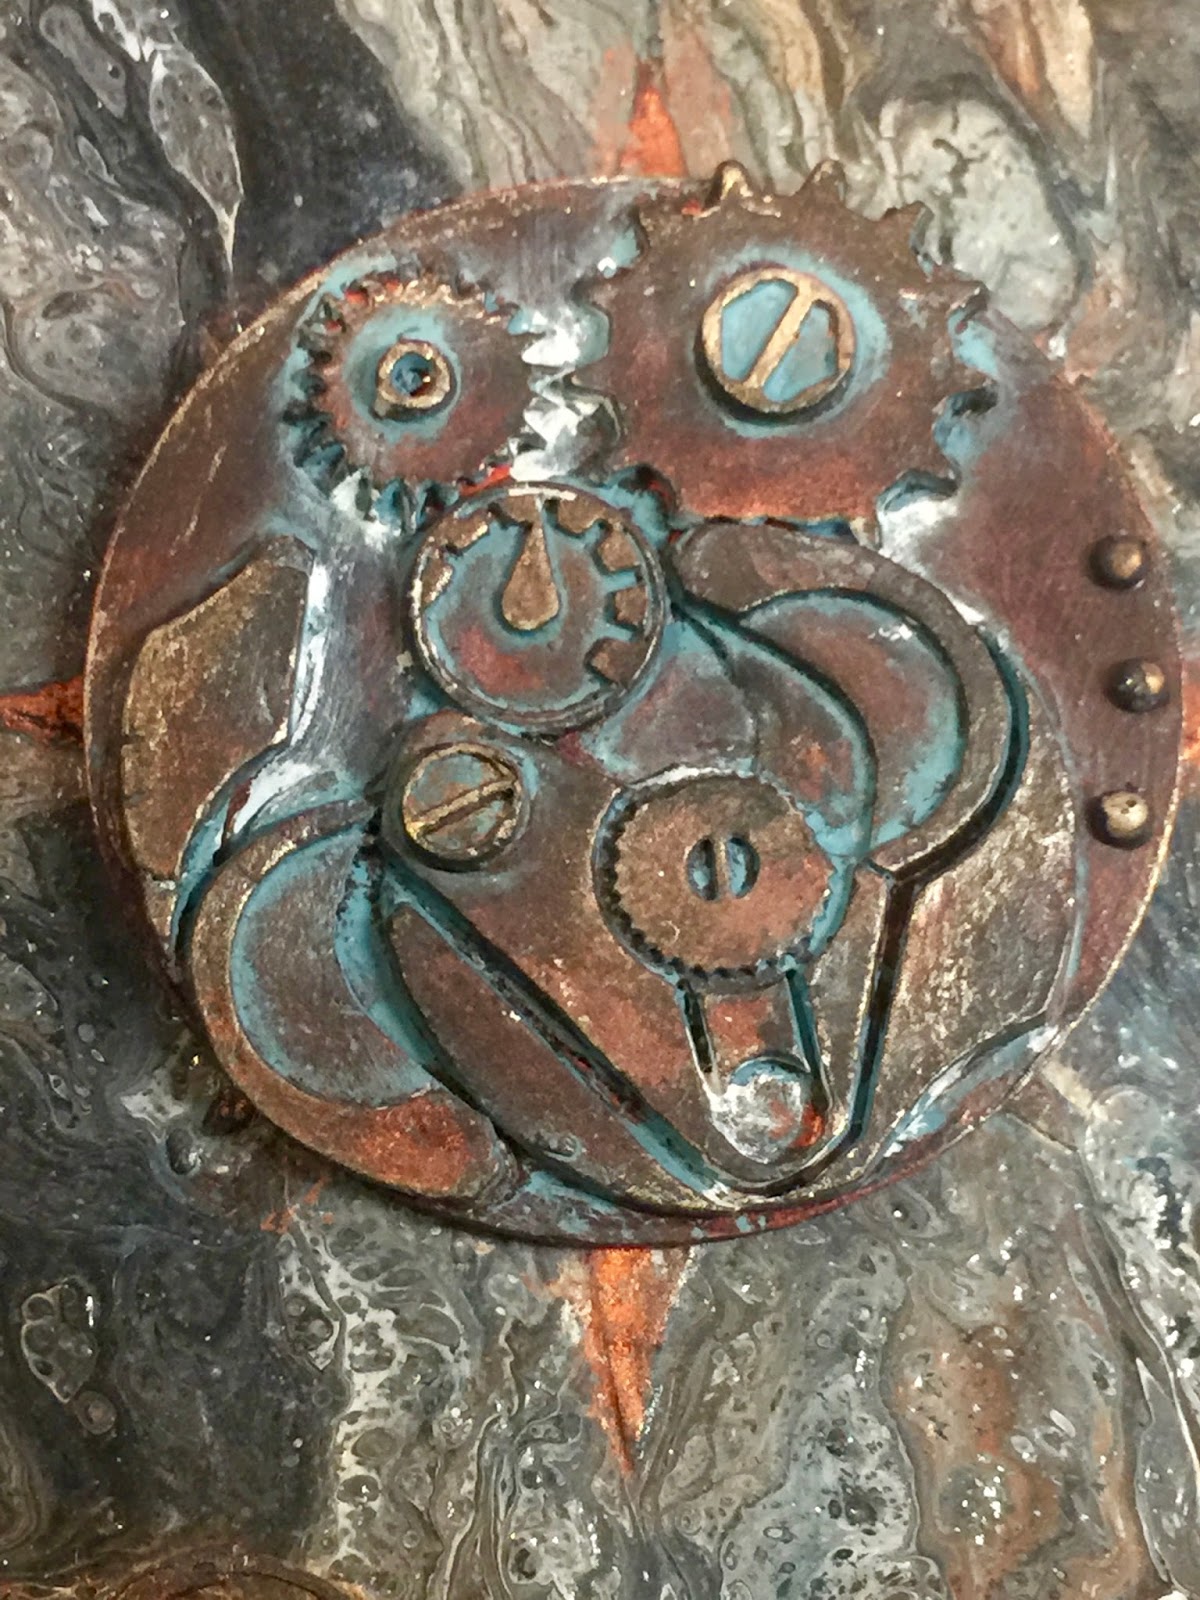
I triple embossed the piece that I had cut the hands off with chunky embossing powders from Stampendous.
 While still hot I pushed a cog stamp from stampendous
into the hot powder. Once cool I used Deco Art patina 
antiquing cream and left to dry. 
 I prepared all three tags by using the following process.
Deco Arts Media black modelling paste was put through 
a verity of stencils. Different stencils were used on
each tag.
 Once the modelling paste was dry I used black gesso followed by black 
media fluid Acrylic as it gives a different surface to the gesso.
This was followed by white then patina antiquing cream.
I embossed the clock and sprinkled some teal over to give it a patina effect. 
 Below you can see I cut the small clock off a bigger piece and 
gold embossed it.
 Tag 1 was collated together and finished off with building wax
and coloured gauze.
 Same for tag 2 I added a glass embellishment to the base of the tag.
Also the same for tag 3 I used the embossed clock and the photo frame
from Boozy bear the frame was painted with Deco art crackle paint and 
coloured with washes of fluid acrylic.
 
I hope you have all enjoyed my post and will be desperate to try these 
amazing chipboard shapes as they are so versatile and you can
 customise them if you so wish.
Cheers Dee x

Friday 1 December 2017

My Final post for SASPC

Hi Everyone I hope you are all well and that your christmas preparations are well underway.I am sad to say that this will be my last blog post for SASPC I will be publishing a how to in December 
for their sponsor boozy bear, I hope you enjoy this piece.
I decided to do 2 journal pages for my last post and have used Pentart rust formula along with a couple of other mediums.
I started with Deco art media modelling paste in white which I put through a DaliART Stencils - Clock Face - 7x7".
I randomly applied some Deco art crackle paste in area's as well to add texture I put it aside to dry.
 Deco art chalk paint in Lace was used to paint over the entire page once dry I applied a coat of pentart silk paint dark brown over the page and wiped back with a dry tissue.
with station and used a wash of sienna and Prussian blue hue.
Antiquing cream in patina was used over the crackle paste and over areas of the clock face.
I knocked this back till I was happy with it.
I used the same stamp to stamp into air dry clay which when dry i painted with Raw umber and prussian blue hue. Once dried I highlighted with finnabairs wax's.
I used clay pieces from a mould I have and painted and guided with finnabairs wax's.
 NEW Stamperia Natural Rubber Stamp crackle was stamped in areas across the page.
Other embellishments were used to across both pages the rust effect at the bottom of both pages was created using pentart rusting powders.
A close up of the project showing the second clay piece using a Tim Holtz stamp.
Coloured using the same technique as the other one.
I have thoroughly enjoyed being part of this team and will try to pop back and take part in the monthly challenge when I can. I hope you have all enjoyed my projects over the last two years.
I will still be here on my blog creating steam punk pieces for you all to enjoy.
You have all been awesome 
Cheers Dee X

Thursday 26 October 2017

Halloween 2017 Over at Tando Creative

Hi everyone its my turn over on the Tando blog to show my Halloween 
make using Tando's layered arch.
I used a lot of texture in my piece using lots of different mediums
why not pop over and check it out!
Just click on the link below.
Cheers Dee x


Sunday 15 October 2017

New October Challenge over at SASPC

Hi everyone Dee here with a Gothic tag for you
I love gothic it reminds me of vampires 
and ghosts.
 the base of this tag was inspired by France Pappillon 
and one of her mixed media shorty video's.
 I just layered it up with deco art's ferro iron paste and
a strip of wire mesh.
 A few bits of embossed elements and a wax compass
I did also make my own stamped tissue 
paper just visible in this photo.
 Another home made embellishment.
 a melted drop of embossing metal below .
 The stamp used to create this was a chocolate baroque 
gothic fragments.
I hope you all like my tag and a big thank you to France Papillon for all 
of the inspiration she inspires in us.
Cheers Dee x


Friday 29 September 2017

Crackle over on the Tando Blog


Hi everyone Its my turn today over on the Tando blog this weeks
theme is Crackle so I have used a lot of bling in this
very grungy Christmas tag.


Also a lot of crackle and Interference colours that give it a lovely 
shimmer.


Let us know what you think.
Cheers Dee x


Friday 22 September 2017

Anything goes


Hi folks Dee here with my latest post for Tando 
creative. Why not pop across to check out what 
the team are up to.
Check out the link below and let me know what you
think.
.
Cheers Dee x

Friday 15 September 2017

New Challenge over at SASPC

Hi everyone Dee here with my latest post for the SASPC challenge
I did something slightly different with this tag I used an acrylic 
pour to create the background for this tag.
I also used paper clay pieces cogs and watch parts from a mould I assembled
them all together on a circle.
I painted with Deco art raw umber fluid acrylic, I then used Finnabairs
 wax and followed with Antiquing cream in both white and patina,
Black modelling paste was put through a deco art stencil.
A close up of the background.
This shows the background from a different view.
Little paperclay cogs to the right corner of the tag.
I hope you all like what I did with this Tag it is such an interesting 
result with paint pouring.
I am proud to be a member of Sandee & amelie's design team.
Please feel free to let us know what you think
Cheer Dee x

Friday 1 September 2017

Deco Art Journal With Vintage Wash and chalky Finish paint

Hi everyone Dee here with a post using the new Vintage wash paints & the Eileen Hull Journal die from Sizzix. I am in love with the colours & the whole feel of this journal it's
like old worn soft leather I can't explain but its so tactile and vibrant.
Please see the base of the post to see the products used
Method Used


  1. Cut the grey board with the Eileen Hull Journal die.
  2. Glue together I used artist tape.
  3. Paint with Chalky Finish paints painting the colours randomly over both sides of the Journal.
  4. Once dry follow with the Vintage wash in Turquoise knocking back with a dry cloth and a baby wipe in the area's that i wanted clear colour follow this with the Patina Vintage wash.
  5. For the inside I wanted a more vibrant red so used the Beige & Red Orange with only a tiny bit of Turquoise.
  6. Seal the whole surface with Soft Touch Varnish.
  7. Once all dry I stamped the script stamp randomly using Stazon ink.
  8. I then followed this with the alphabet stamp and versfine ink using the stamp and bond then heat set.
  9. Using a brush dab the gold pigment powder over the stamp and bond then using a large fluffy brush stroke over to remove the access powder.
  10. To colour the coin I painted first with gold media fluid followed by raw umber.
  11. Using first patina antiquing cream knock it back follow with white gentle remove and swipe with guilding wax.
  12. Thread up your Journal using cord as per instructions and I attached some beads to the ends.
.

Some close ups! 


And some more!!


Products used
  • Vintage effect wash:- Turquoise, Patina, Beige & Red Orange.
  • Chalky Finish Paint:- Romance, Rouge, Heritage, Cameo & inheritance.
  • Media Fluid Acrylic:- Raw Umber, Gold
  • Media Antiquing Cream in patina & white
  • Media soft touch Varnish
  • Gold pigment powder
  • Stamp and bond from stampendous
  • Versa mark ink pad
  • Eileen Hull Journal die (sizzix)
  • Stazon Timber Brown
  • Artist tape
  • Art mould Chinese coin
  • Paper clay
  • Stamps Neil Walkers Alphabet Soup and a script stamp from my stash.
  • Beads and cord from my stash.